개요
테스트 환경
WebSphere Application Server 9.0.5.1
WebSphere Application Server Network Deploymnet 9.0.5.1
IBM HTTP Server 9.0.5.1
IBM SDK, Java Technology Edition, Version 8 8.0.5.40
구성
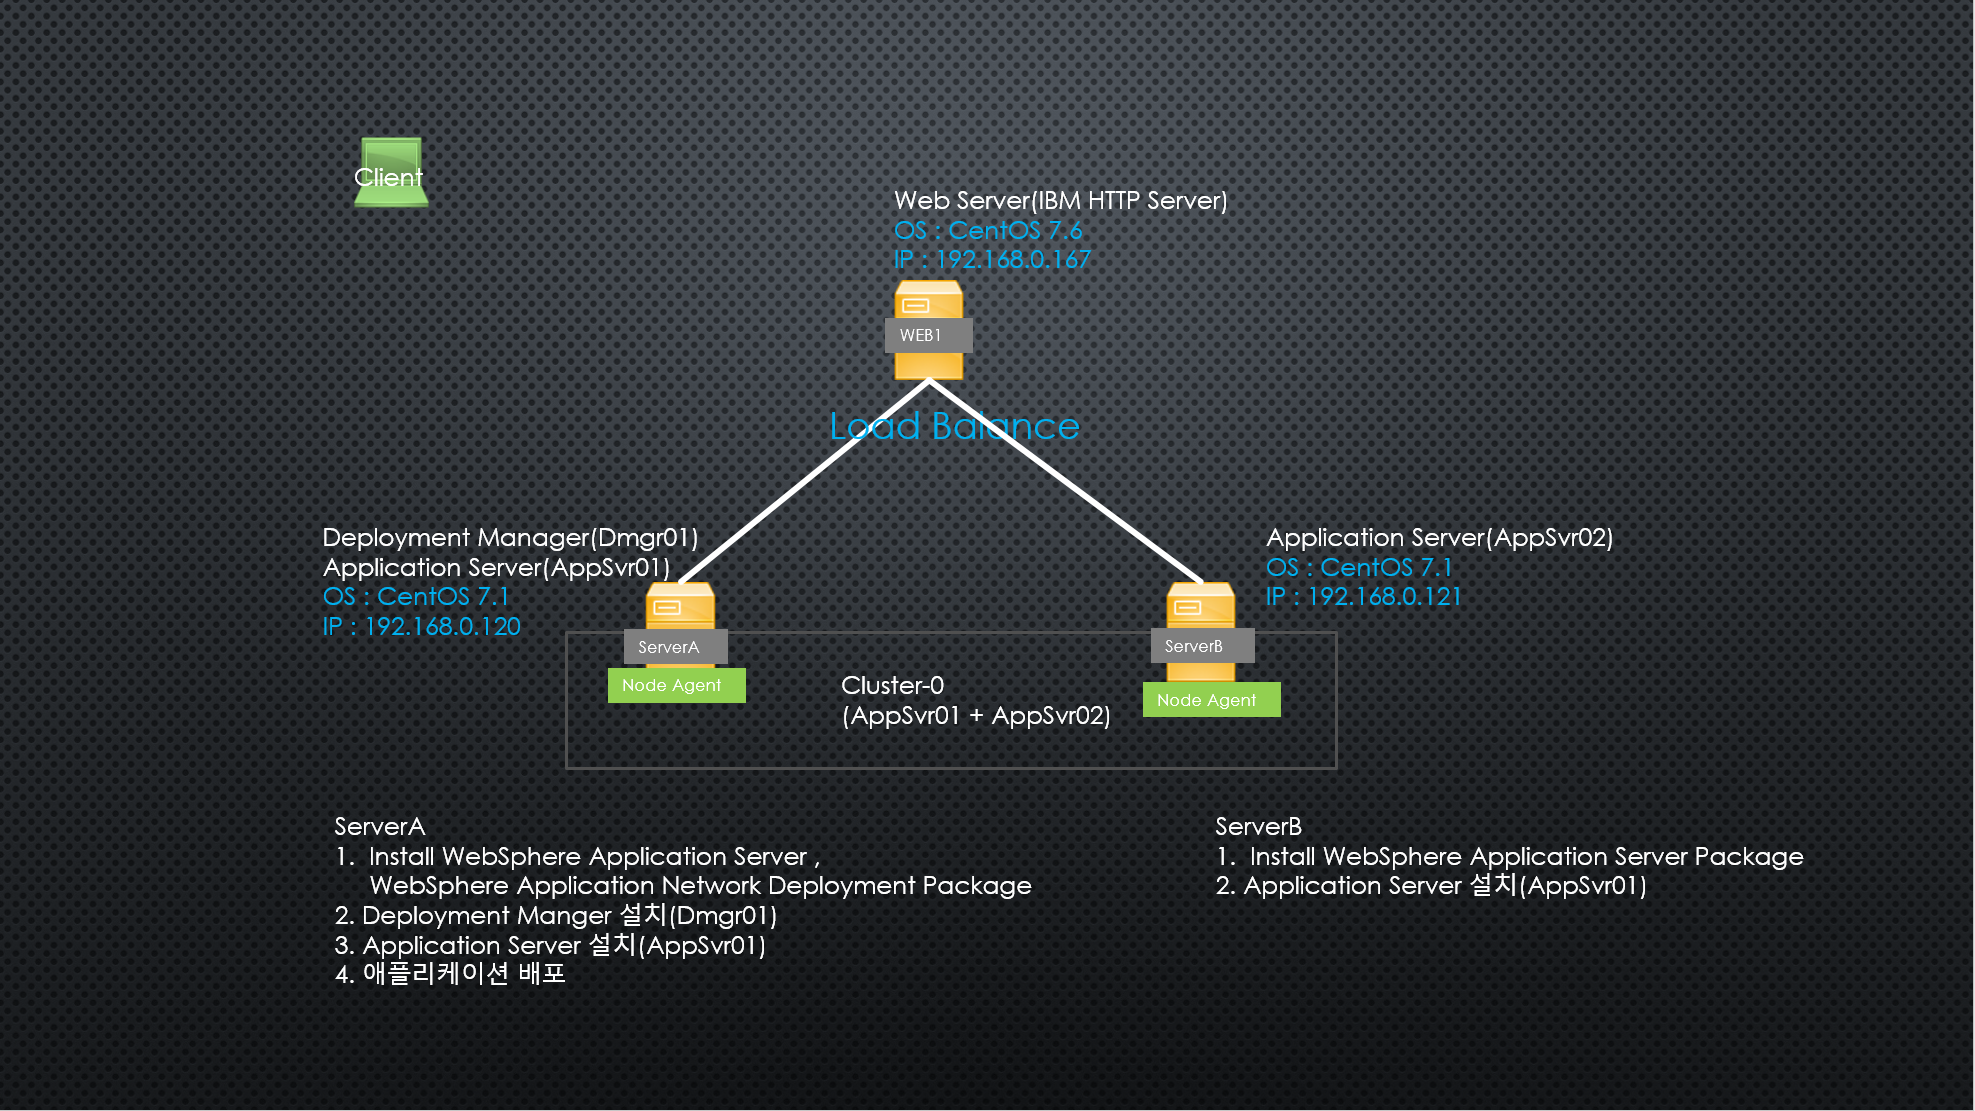
절차
- ServerA
shell> nd_svr_dir/bin/manageprofiles.sh -create -profileName Dmgr01 -profilePath nd_svr_root/profileTemplates/management -serverType DEPLOYMENT_MANAGER -enableAdminSecurity -userName <dmgrdmin> -password <dmgrpass>
2. WAS 프로파일 생성
shell> ./manageprofile.sh -create -profileName AppSvr01 -profilepath /webSphere/profiles -enableAdminSecurity -userName <wasadmin> -password <wasadmin>
3. 노드 추가
shell> app_svr_dir/bin/addNode.sh <dmgr_host><soap_port> -profileName AppSvr01 -username <dmgradmin> -password <dmgrpass>
- ServerB
5. WAS 프로파일 생성
shell> ./manageprofile.sh -create -profileName AppSvr02 -profilepath /webSphere/profiles -enableAdminSecurity -userName <wasadmin> -password <wasadmin>
6. 노드 추가
shell> app_svr_dir/bin/addNode.sh <dmgr_host> <soap_port> -profileName AppSvr02 -username <dmgradmin> -password <dmgrpass>
7. 클러스터 생성(배치 관리자)
Step 1) 서버 > 클러스터 > WebSphere Application Server 클러스터 > 새로 작성

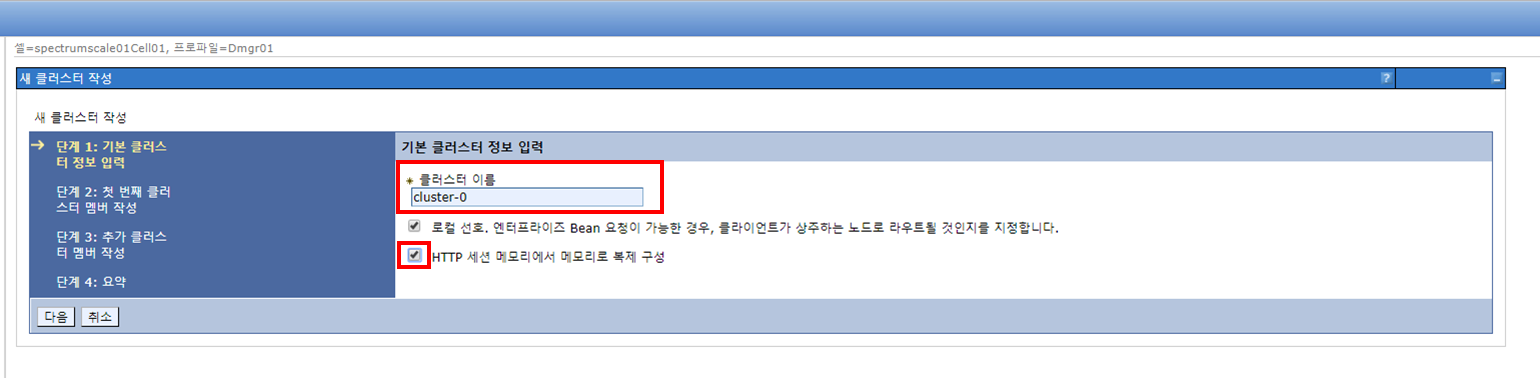
Step 2) 클러스터 이름및 HTTP 세션 복제 구성
Step 3 ) 첫번째 클러스터 멤버 작성

Step 4) 추가 클러스터 멤버 작성

Step 5) 추가 클러스터 멤버 추가 완료 되었으면 다음 진행

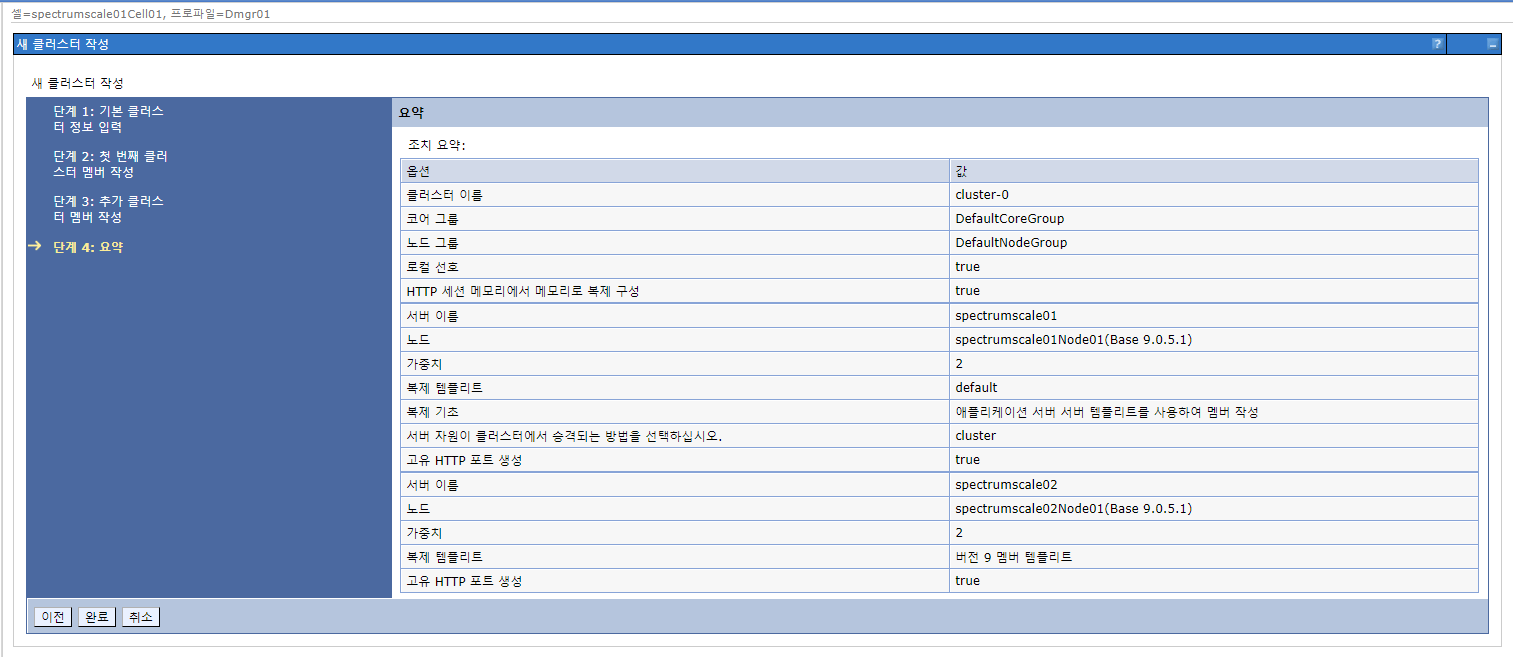
Step 6) 클러스터 작성 요약
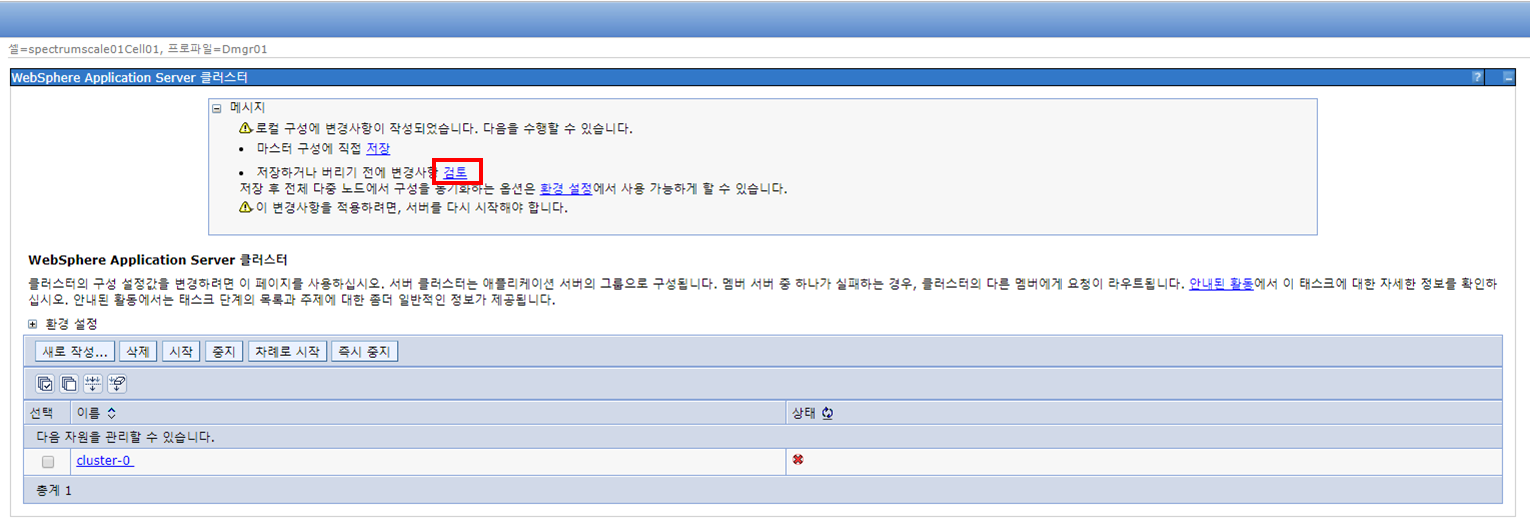
Step 7) 변경사항 검토및 저장


Step 8) 클러스터 시작

7. 애플리케이션 배포
Step 1) 애플리케이션 > 새 미들웨어 애플리케이션 설치 > Java 2 Platform, .... > 다음

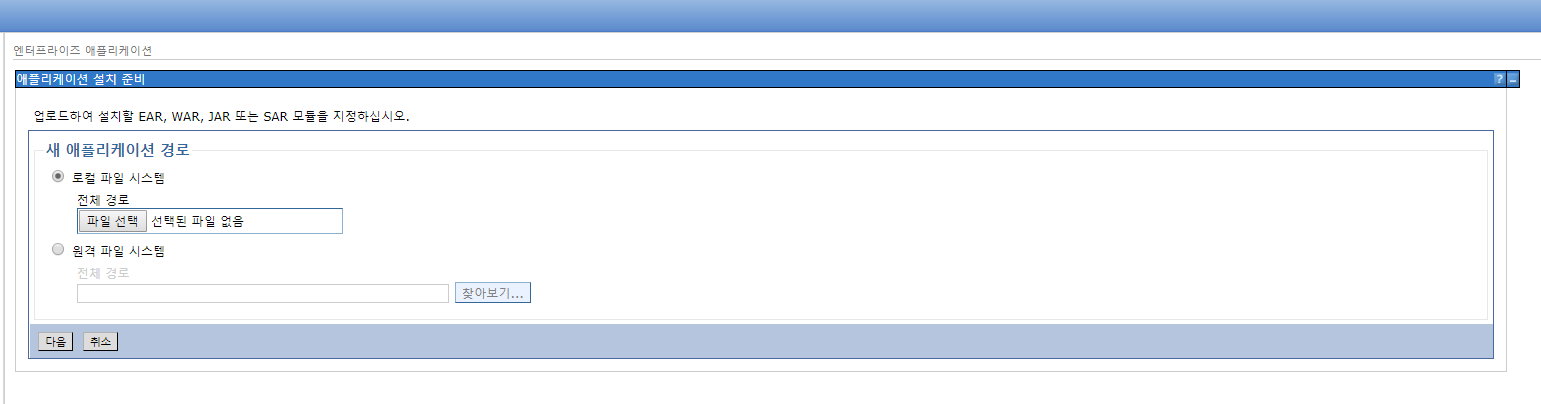
Step 2) 애플리케이션 선택
Step 3) 애플리케이션 설치 방법 선택

Step 4) 설치 옵션 선택

Step 4) 서버에 모듈 맵핑(모듈, 클러스터, 웹서버 선택후 적용)


Step 5) 웹 모듈에 대한 가상 호스트 맵핑

Step 7) 컨텍스트 루트 지정

Step 8) 모듈의 메타데이터 속성

Step 9 ) 설치 요약

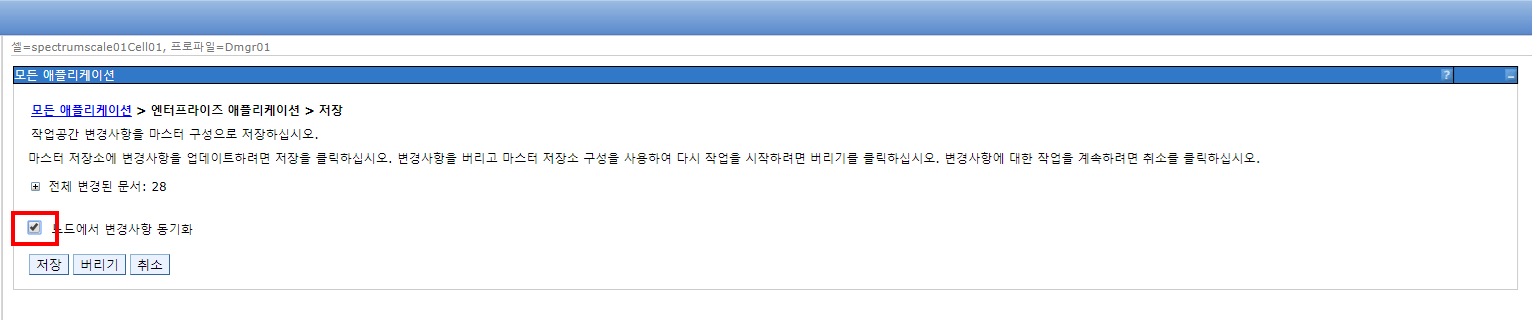
Step 10) 검토 및 저장


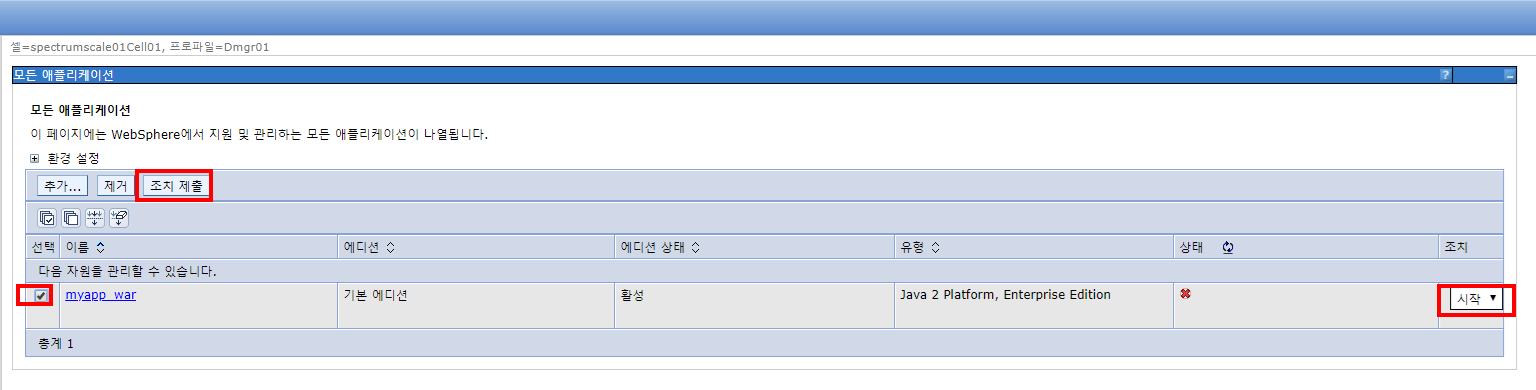
Step 11) 애플리케이션 시작
8. 플러그인 전파

9. 웹 서버 재시작
shell> bin/apachectl restart
'WEB & WAS > WebSphere' 카테고리의 다른 글
| [WebSphere] Context간 세션 공유 (0) | 2019.09.29 |
|---|---|
| [WebSphere] IBM HTTP Server(IHS) 관리 서버 구성 및 배치 관리자에 웹서버 추가 (3) | 2019.09.27 |
| [WebSphere] Deployment Manager(배치 관리자) 구성 (0) | 2019.09.25 |
| [WebSphere] 어플리케이션 배포(Stand-alone 모드) (0) | 2019.09.25 |
| [WebSphere] Application Server 프로파일 생성 및 관리 (0) | 2019.09.25 |


